You don't need a fancy program to do this. You can do it online for free at Picnik. It is so easy. And fun! I'll walk you through adding a caption to a photo.
Click here
Hit the 'Get Started' button and create your free account.
Once you've created an account, which takes all of a minute, you will be directed to your 'home'. Click on the Upload Photo button on the left side of the page and choose a photo from your computer.
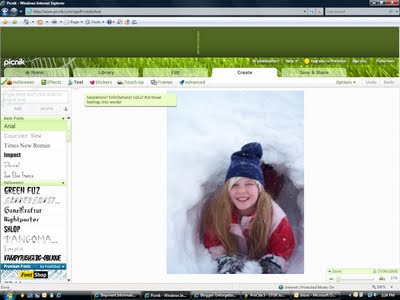
Once your photo is uploaded click on the 'Create' tab. This is where you'll find all the special effects as well as the text tool.

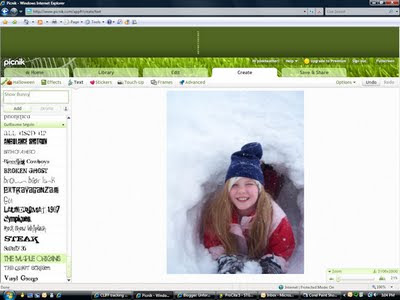
Select the text you want by clicking on it. (it will highlight green)
Above the list of fonts is a window that says 'type here and click ADD to place text'. Type in your title or journaling here.

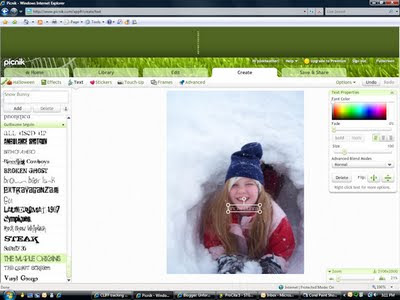
Hit the ADD button and the text will appear on your photo with a box around it. To the right of your photo the text editing options pop up.

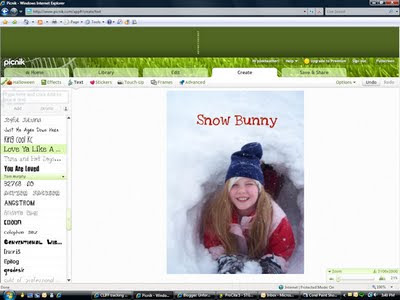
You can now move your text to where you want it. You can change the colour and/or size of your font, as well as play with other options available.

Once your text and photo is as you want it, it's time to save it back to your memory stick or computer. Click on the 'Save & Share' tab. Make sure the 'save to computer' tab is selected (it's the default so you shouldn't need to change anything). Type in your file name in the box at the top. Then hit the green 'Save' button. Browse to the folder (or drive if you are saving it back to your memory stick), and hit save again.

So there you have it. Easy peasy.
Just remember; before you get your photo developed at the store tell Lynette that you've played with it digitally.


No comments:
Post a Comment